🪄 Workflow Import
The Import page allows you to upload single or multiple workflows to your Jira Cloud instance. Use Workflow Wizard to seamlessly manage importing workflows in a few simple steps.
How To
1. Navigate to the Import Page
The Workflow Wizard is an app for Jira Cloud. To access it:
- Go to the Apps section in the Jira Cloud sidebar.
- Select Workflow Wizard, and then navigate to the Workflow Import page in the sidebar.
2. Upload the JSON File
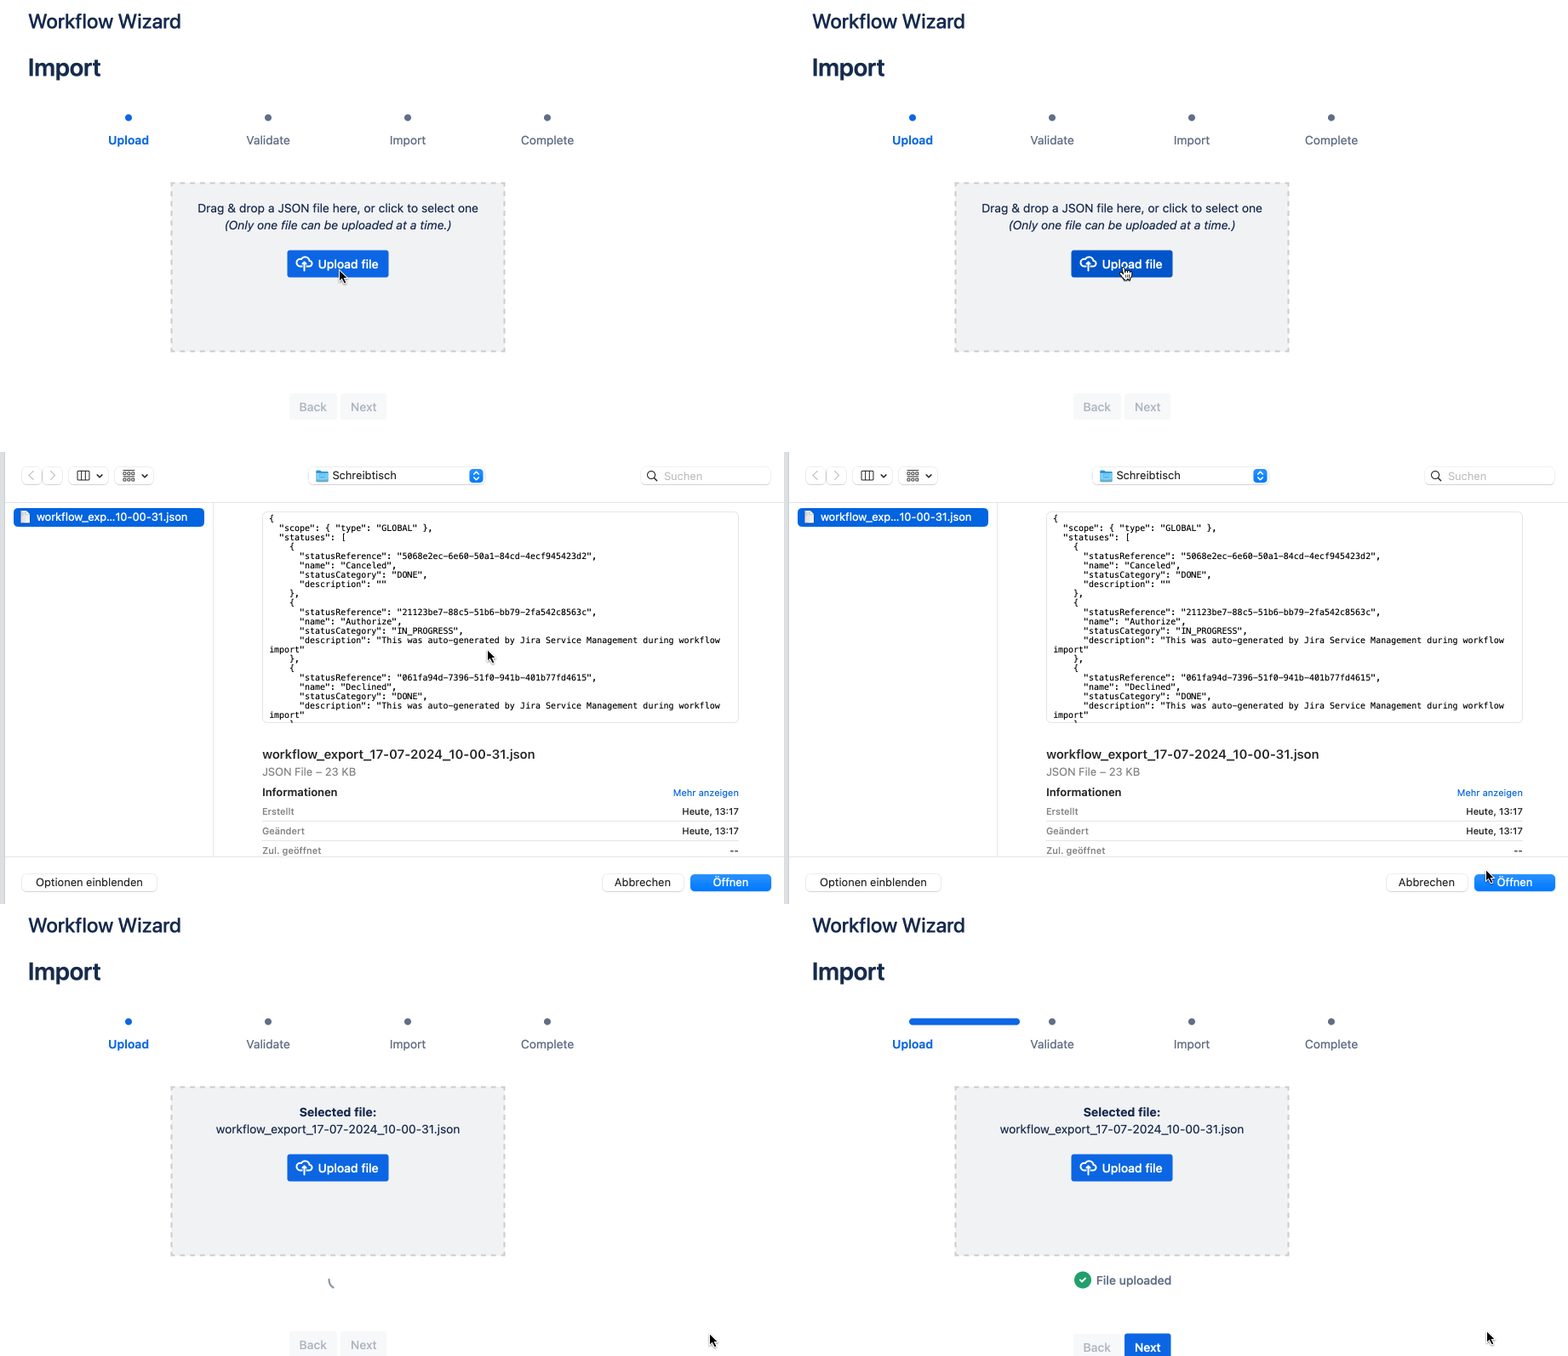
To upload a workflow:
- Click the "Upload File" button and choose the JSON file you wish to import, or
- Drag and drop the JSON file directly onto the Import page.

3. Validation
Once the file is uploaded, click Next to validate the workflows. Workflow Wizard will:
- Check the compatibility of the imported workflows with your existing Jira workflows and statuses.
- Any other conflicts can be solved directly in the JSON file.
Resolving Conflicts
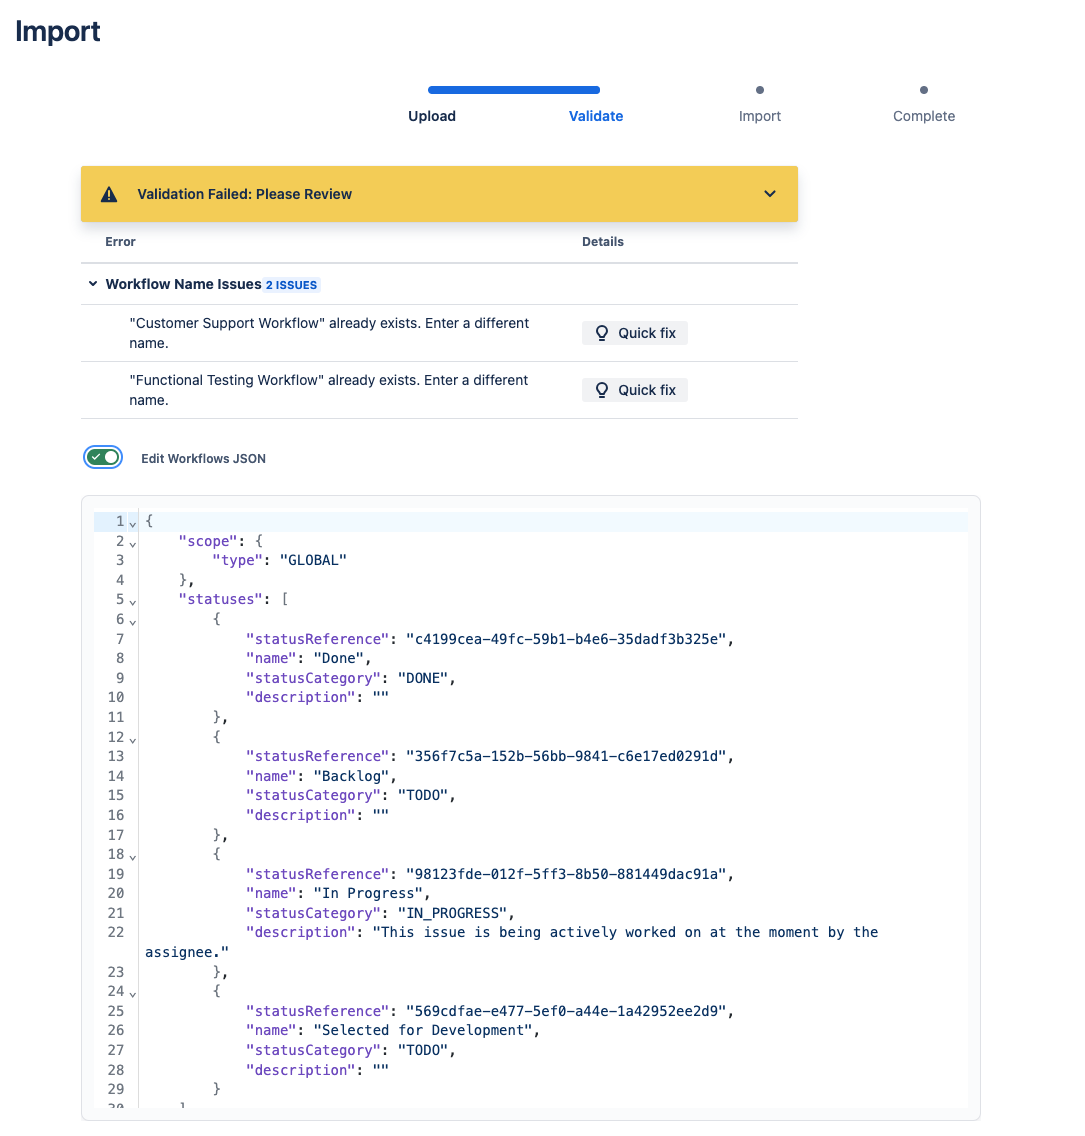
If the validation finds conflicts (e.g., duplicate workflow names or incompatible statuses), a warning will appear.
-
Quick Fix Options: For common issues, such as workflow name conflicts, a Quick Fix button will allow you to resolve the issue directly.
-
JSON Editor: For other conflicts, you can manually edit the JSON file in the editor. Click the toggle button Edit Workflows JSON to open the Editor.
-
The validation process will re-run automatically after each change, providing real-time feedback on the status of your corrections.

It is recommended to only address the conflicts highlighted during validation and avoid making other changes to the JSON structure to ensure compatibility.
4. Import the Workflow
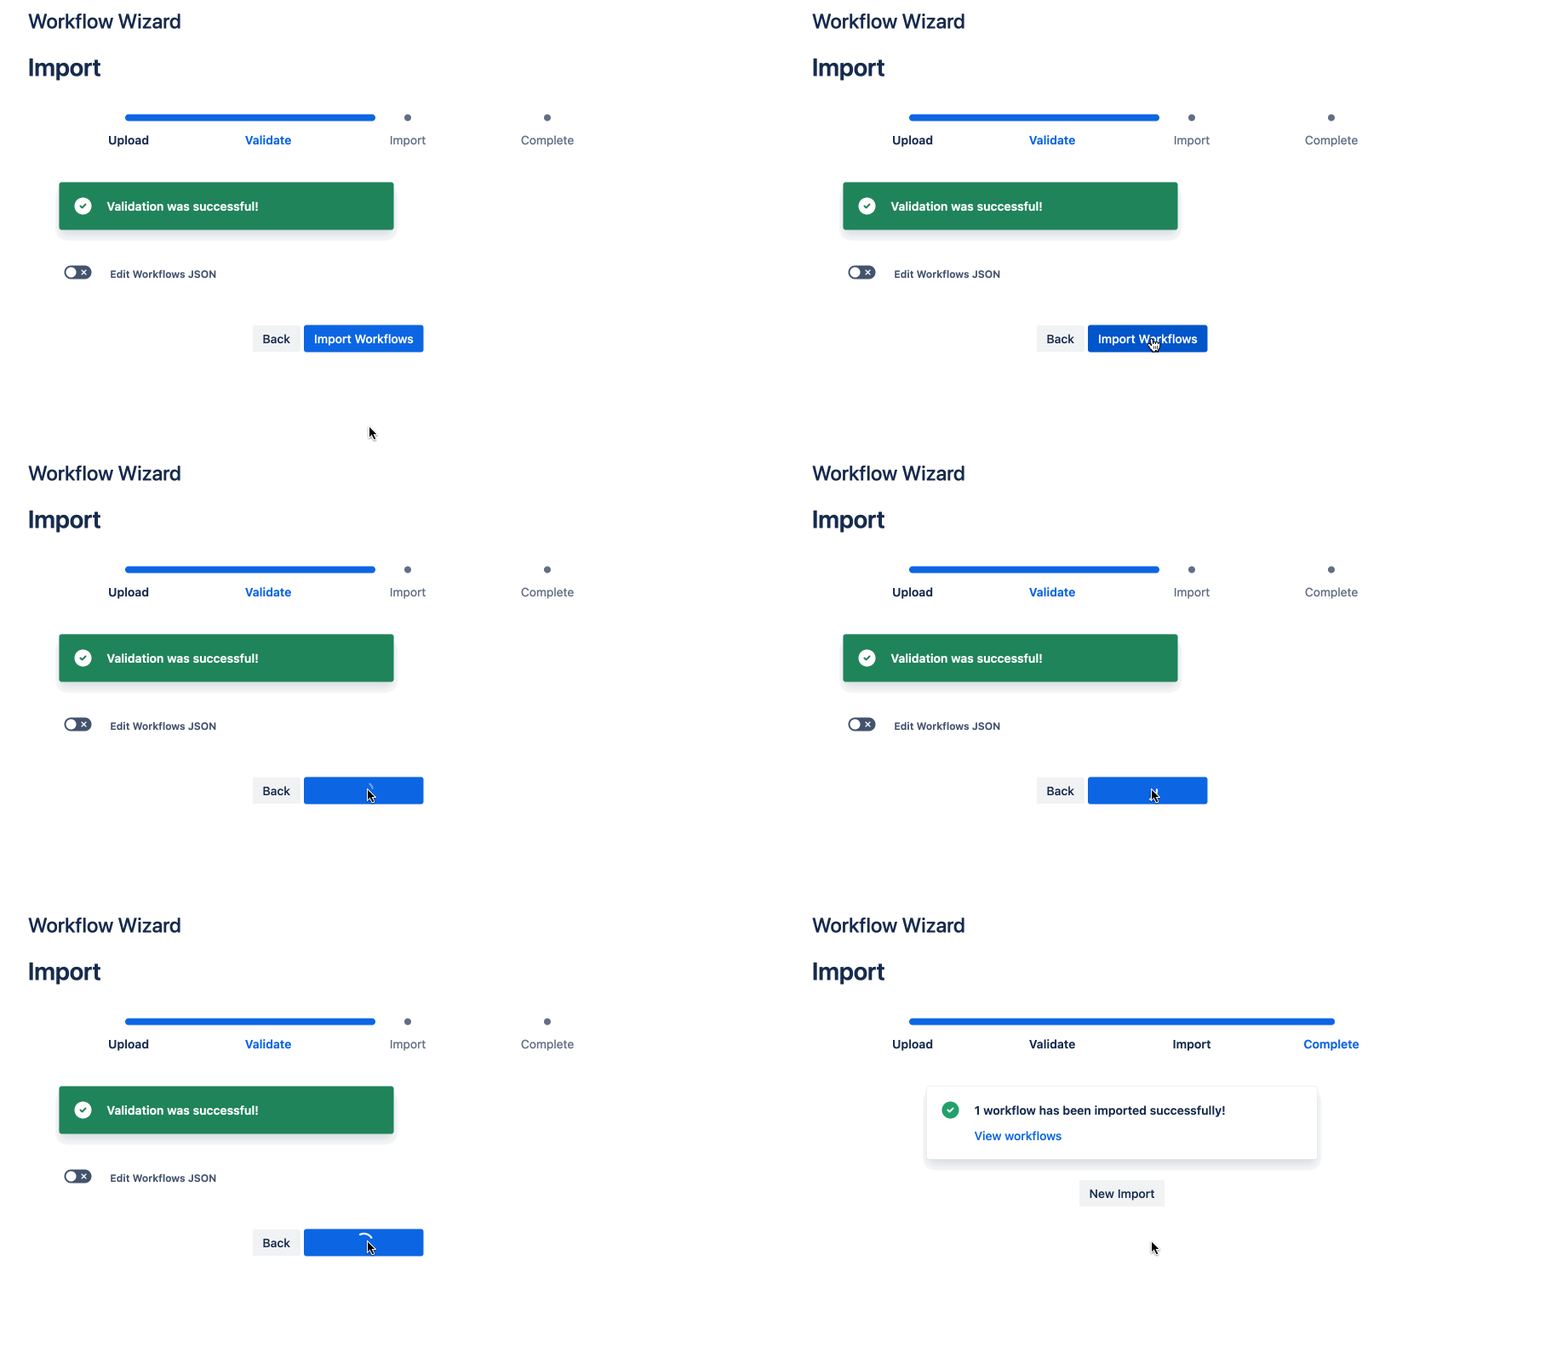
After all conflicts are resolved and validation is successful:
- Click the Import Workflows button to create the workflows in your Jira Cloud instance.
Workflow Wizard will handle the creation process, ensuring your workflows are imported seamlessly.

- You can jump to the Workflow Page in Jira when clicking "View workflows"
By following these steps, you can efficiently import workflows while ensuring compatibility with your Jira Cloud instance.